# Simple Storage Service (S3)
# Create an S3 Bucket
# Log into your AWS account and navigate to S3.
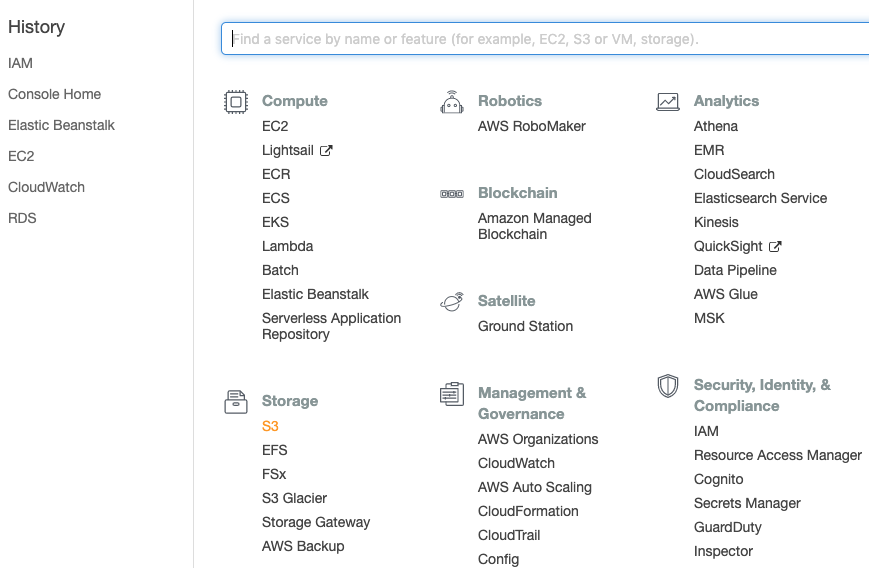
# Click Create Bucket to start creating a new bucket.

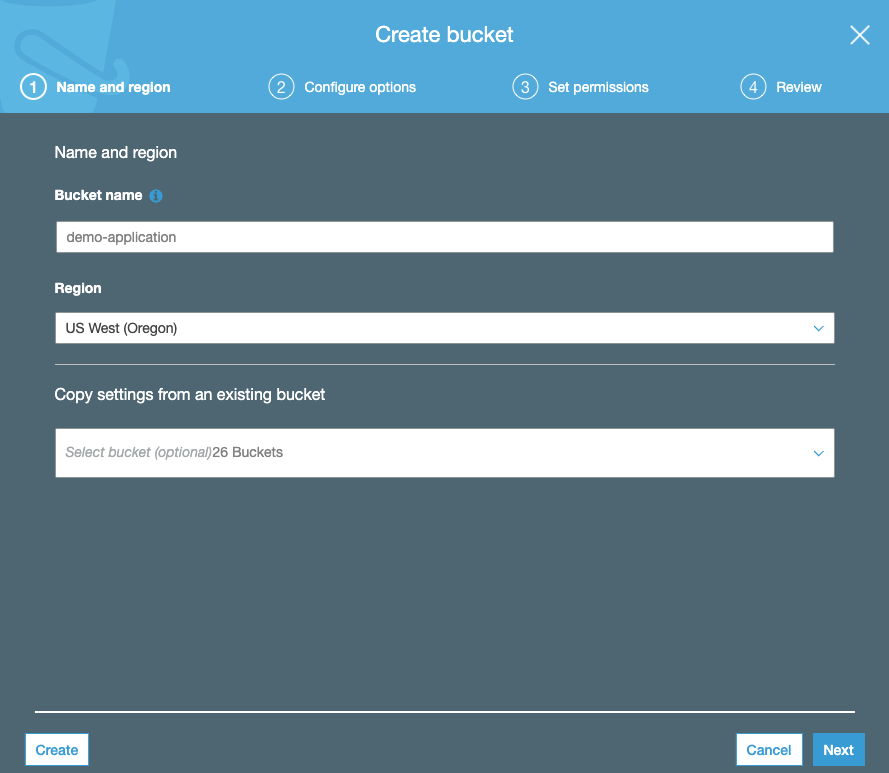
# Name the S3 bucket.
This name must be unique across all AWS S3 Buckets.
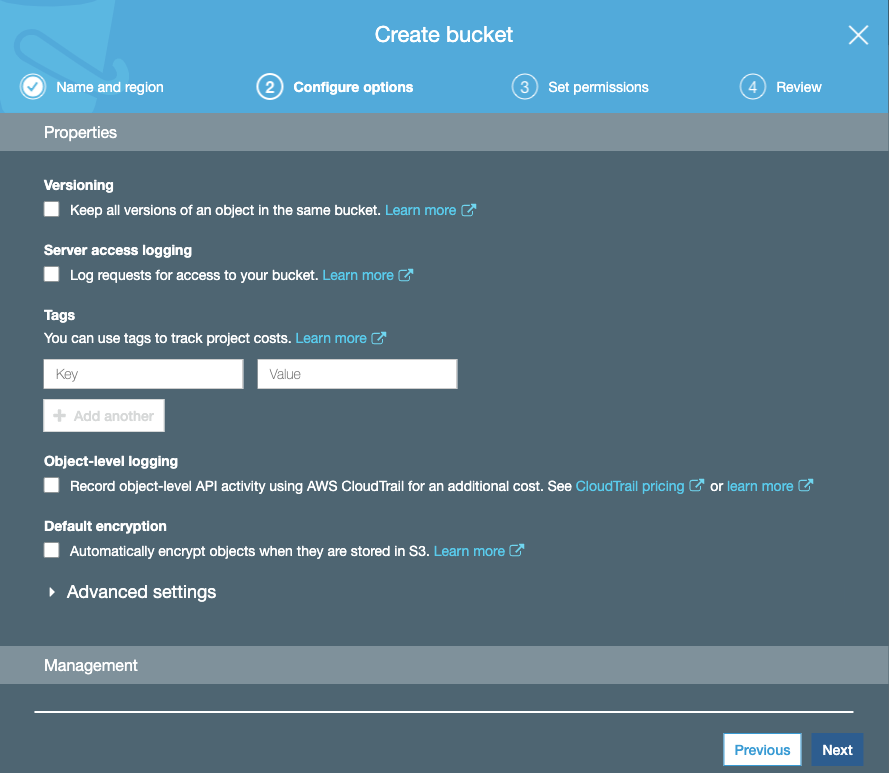
# Configure the S3 bucket.
The default settings should be adequate unless the additional features are required.
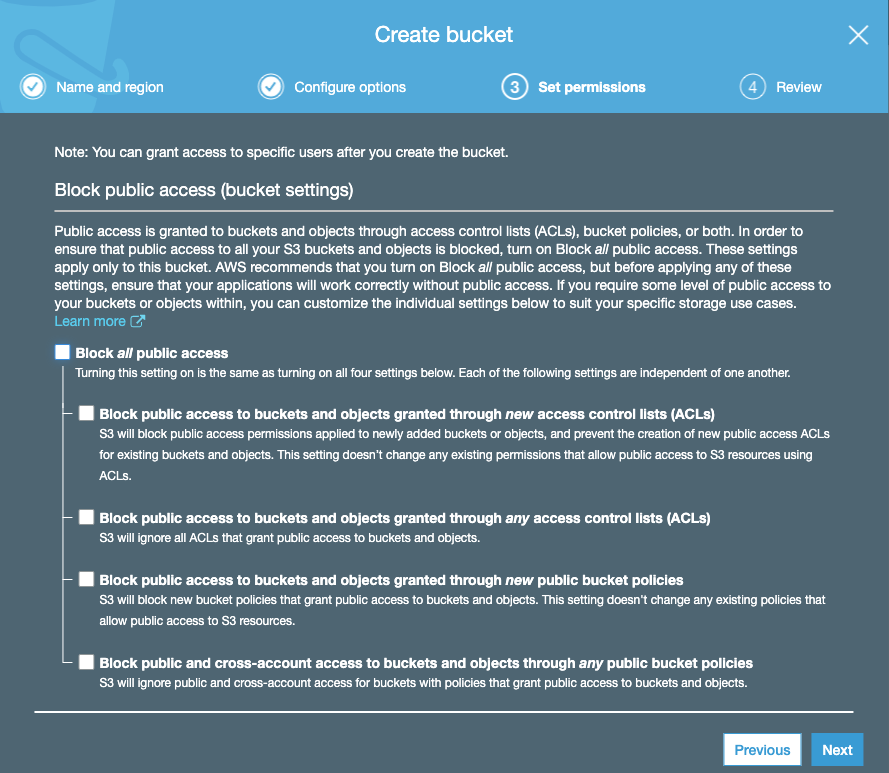
# Set permissions on the S3 bucket.
Typically we are using S3 for our assets storage so public access is needed to serve the images/videos.
WARNING
If the data being stored on S3 should not be publicly accessible then you will need to be more careful with your bucket permissions.
# Review the S3 bucket's settings and finish creating it.
TIP
You may need to edit the bucket after this to configure ACL or CORs.
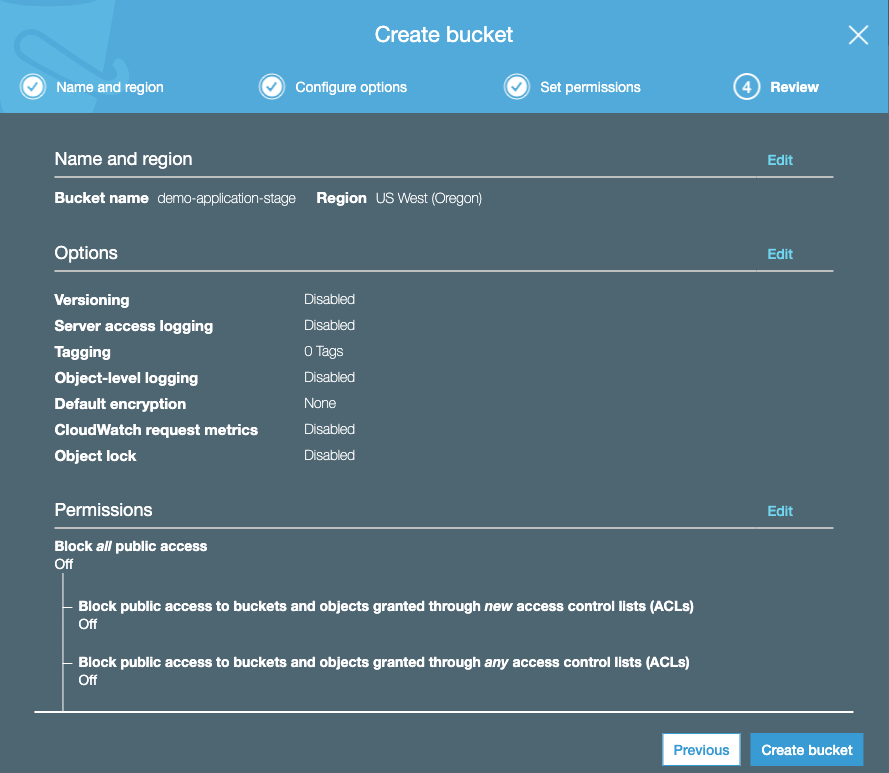
# S3 ACL
# Public list-objects ACL
# Find your bucket and being editing.

# Go to the Permissions tab and then to the Access Control List tab.
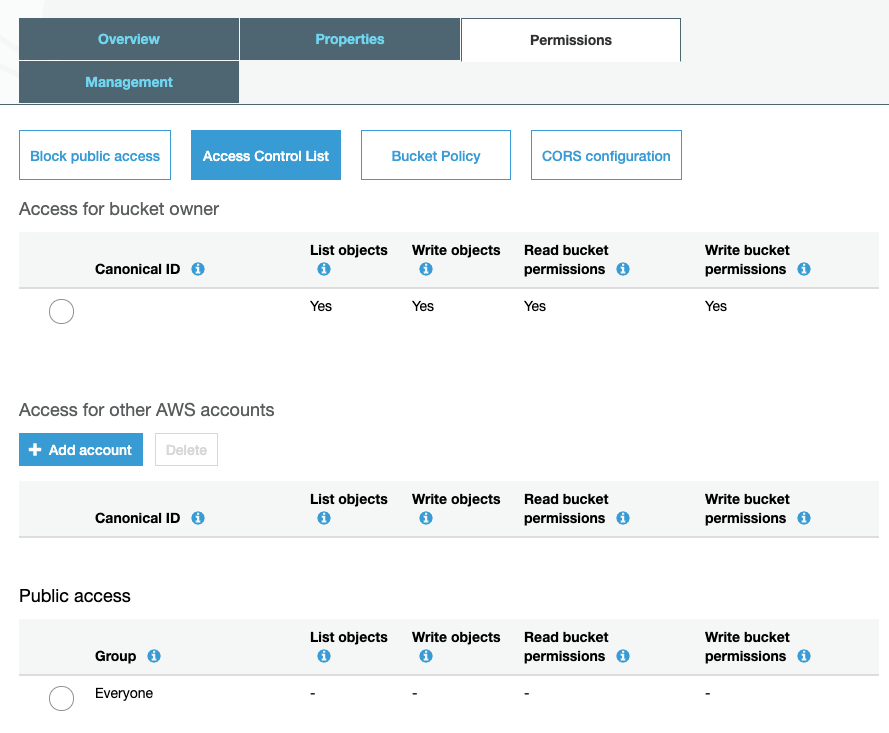
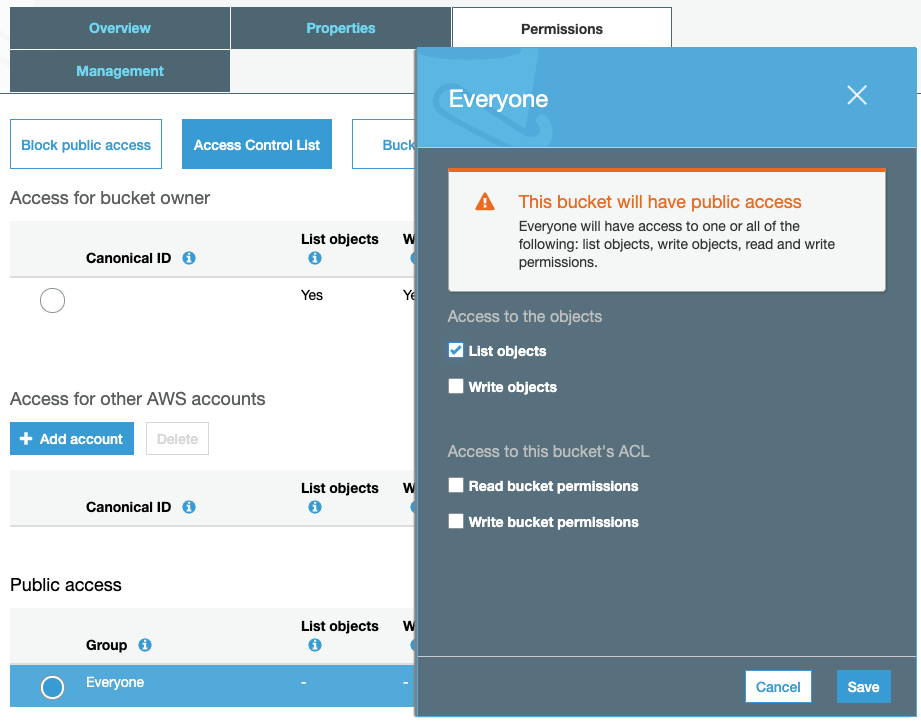
# Select Everyone, check the List objects box, and save your changes.
# S3 CORS Configuration
# Simple CORS Configuration
# Find your bucket and being editing.

# Go to the Permissions tab and then to the CORS configuration tab.
WARNING
This is just the basic CORS sample AWS provides. You may require additional tweaks.
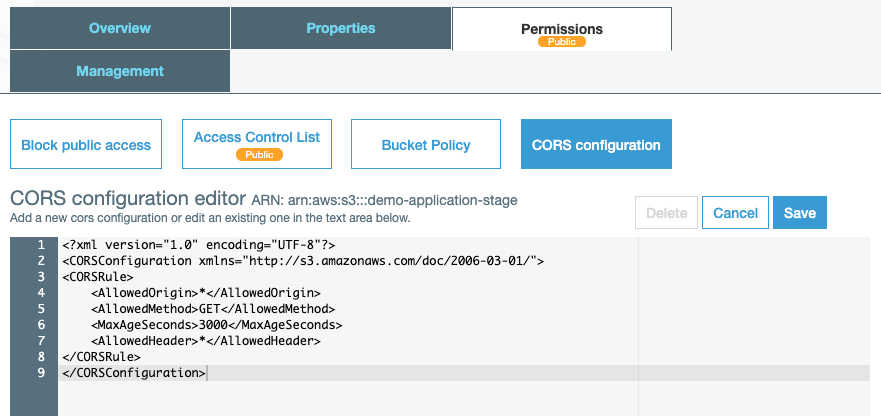
<?xml version="1.0" encoding="UTF-8"?>
<CORSConfiguration xmlns="http://s3.amazonaws.com/doc/2006-03-01/">
<CORSRule>
    <AllowedOrigin>*</AllowedOrigin>
    <AllowedMethod>GET</AllowedMethod>
    <MaxAgeSeconds>3000</MaxAgeSeconds>
    <AllowedHeader>*</AllowedHeader>
</CORSRule>
</CORSConfiguration>